Docker for Class Assignments
Supercharge your homework and take over the world!
By Philip TaylorWhat is Docker?
Docker is a command-line tool for creating, managing, and distributing Linux application sandboxes. These sandboxes, called containers, act like virtual machines but are much faster, lighter, and more flexible because they leverage the host system’s kernel instead of starting their own.
These containers are great for developing server based homework assignments because they make it really easy to create temporary server environments that can be automatically reproduced. Because these server environments are isolated from each other and the rest of your system you can easily have a configuration like PHP 7.4 installed on your host system, PHP 5.6 installed in a sandbox, and PHP 7.1 installed in another sandbox without running into any conflicts. This is good for students in multiple classes working on projects that might require conflicting versions. However, it’s even better for professors because they have to grade dozens of projects that often do require conflicting versions.
Docker follows the principle of Infrastructure as Code. A “Dockerfile” is a script that describes the steps you would normally take to set up a virtual machine. When you use Docker’s build feature it goes through each step of the Dockerfile and at the end creates a snapshot, called an Image. Every time you make a container it starts with the Image and builds on top of it.
When you use Docker’s compose feature, it will read a code file called
docker-compose.yml that tells it how to create and configure multiple
containers that are linked together. This is useful for situations where you
need multiple servers for one project, like a React project that requires PHP,
MySQL, and NodeJS all working together.
Most of the time Containers are intended to be ephemeral, getting created and deleted on an as-needed basis. Anything inside the container is considered temporary, so if some data needs to be saved permanently (such as a database) it should be mapped to a location on the host or to a network share. This approach encourages the principles of Infrastructure as Code and Configuration as Code by effectively requiring you to perform any permanent system changes in the Dockerfile or application code instead of in the container’s command line line.
One of Docker’s most important utilities is the Docker Hub where pre-made images can be downloaded. This hub is similar in function to a package repository like you’d find on any Linux system, an app store like you’d find on a mobile phone, the Windows store, etc.
Docker has a few notable advantages over virtual machines:
- Disk Usage: A typical virtual machine requires you to dedicate between 10 and 30 gigabytes of disk space. However, a typical Docker container is under one Gigabyte and portions of that space can be shared if multiple containers use the same base system. Creating three containers based on Ubuntu will only require one copy of Ubuntu on the host system. Creating three virtual machines based on Ubuntu, however, requires three full copies.
- Portability: When you want to share your project with a friend and you’re using a virtual machine, you have to package up the virtual system and send them a file usually several gigabytes in size. When you want to share a Docker project with a friend, however, you only have to send them the code files used to build the environment. It’s also very easy to upload these code files to sharing sites like GitHub so they can be easily accessed from anywhere.
- Host Integration: Virtual machines were designed to give the best separation from your host system as possible. Many virtualization platforms offer “Guest Additions” that clipboard and file sharing, but they aren’t always easy to install or use. Because Docker leverages the host kernel it it’s is dead simple to map host folders and network ports into the container. When using this feature the folder effectively exists on both systems simultaneously.
For development purposes the unique advantages Docker offers are unmatched. I believe it will be a vital resource for developers for years to come, despite its short seven year tenure and very slow rise to fame.
How Do Images work?
Docker’s basic building block is the Image. A Docker Image contains all the application files, dependencies, and system components (other than the kernel). When creating an image for yourself you won’t have to start from scratch: an image is usually built by overlaying on top of an existing base Image. In this case, each individual Image will only contain the changes made to the previous Image rather than the complete set of system files. This is helpful because multiple images based on, for example, Ubuntu will only require a single copy of Ubuntu to work, saving disk space and bandwidth (if the Image must be downloaded).
Most applications you build will start with the Ubuntu or Alpine Image and just apply a small set of changes from your Dockerfile. When Docker builds your final application it will download or create each Image separately before finally combining them into the container.
As an example, a PHP container may contain the following components and layers:
- The Linux kernel. On Linux hosts this is natively available. On Windows hosts this is virtualized through Hyper-V or VirtualBox.
- The Alpine Image (downloaded). Alpine is a lightweight set of system utilities that build on the kernel to provide features like a shell / command line.
- The PHP base Image (downloaded). This layer adds the Apache and PHP servers, though variants are available that use Nginx instead of Apache, or offer just the PHP interpreter and require you to provide your own web server.
- A PHP-customizing image (built). This layer would include PHP extensions like MySQLi and configuration file changes like allowing PHP short tags.
Your final container will be built upon that 4th image. Docker will auto-detect the dependency chain and fetch the PHP and Alpine images from a remote server, or if you have a usable version already downloaded from another container it will re-use that one. Further, if you have multiple containers that all use the same layer underneath, that layer will only exist on your host system once. This is in stark contrast to a virtual machine, where five Ubuntu VMs will result in 5 copies of every Ubuntu component on the host system.
The first time you run a container all of those layers will be downloaded, taking a time dependent on your network speeds. A slow speed could result in a wait of, say, a half hour to download every component. Faster speeds could result in your downloads taking only a minute or two. But the second time you run the container, all the components will already be on your system and the container will start near instantly.
There are many pre-made images that won’t require you to add new layers on top of or really make much customization to at all to use. For example, the images for MySQL, PostgreSQL, Nextcloud, and Minecraft server are all pretty plug and play.
How do Volumes work?
Volumes are the way Docker shares files between containers and the host system. The simplest type of volume specifies two folder paths, one on the host file system outside the container, and one on the guest file system inside the container. Docker will mount the host folder into the container so that, from the perspective of an application running inside the container, it’s just a folder.
For example, if you’re running a webserver inside the container and you want to
populate the web root with the contents of an html folder on the host system,
you might define a volume ./html:/var/www/html:ro that will replace
/var/www/html inside the container with a read-only mount of the specified
host folder.
Volumes can also be created between containers, though the usefulness of this technique for simple projects is limited, and the syntax to do it is pretty verbose.
Because Containers are ephemeral, volumes are the primary way your application will save data long-term. A MySQL container will almost always have a volume to save the database contents.
How does Networking work?
By default, the network inside the container is isolated from the network
outside. If an application is listening on a port inside the container, traffic
to that same port on the host will not be automatically forwarded into the
container. If you start twenty containers each with a webserver listening on
port 80 inside, they will run simultaneously just fine.
Docker lets you map any port on the host to any port inside the container. The
port configuration 8080:80 will make port 8080 on the host forward any
incoming traffic to port 80 inside the container. Because any port on the host
can be chosen, you can run multiple containers that would normally listen on
the same port but map each to a different host port.
Inside the container, or group of containers made with Docker Compose, the app
is actually running on the default port. This means that when you write code
to run inside a PHP container that’s meant to access a MySQL server, you will
always access it at port 3306. But when you want to connect to the MySQL
server from outside with something like MySQL
Workbench, you can connect on any
port you define at run time. This standardization makes it easier to read and
understand the code, and easier for a professor to adapt your code to their
system without digging to much into it.
When using Compose to manage groups of containers, each container can reach the
other at a hostname that’s the same as the container name. So if your Compose
file creates a container called php and a container called database, the PHP
code will access the database at database:3306 regardless of how the person
running the project has configured networking on their host.
If you’d like, you can tweak a container’s internal hostname to be whatever you
want. One example where this is useful is if you’re writing a project that is
supposed to connect to a professor’s database at cit.marshall.edu:3306 but you
want to work offline, you can create your database container with hostname
cit.marshall.edu. Any traffic to that address generated by a container in the
group will be automatically sent to the database container. When you move your
code to a server outside your Docker configuration, it will connect to the real
cit.marshall.edu without having to make any changes to the code.
These kinds of tweaks to your local configuration make it possible to use Docker as a development environment that closely mirrors a production environment. When working software jobs professionally it’s always good to keep your development environment and production environment as similar as possible. If you can run the same code locally that you do on the remote servers you’re one step closer.
How do I install Docker?
The way you install docker is dependent on your host system. Linux systems can get it from their system package manager. Windows systems will require a different installer based on the version–Home systems will need the “Toolbox” version which uses VirtualBox under the hood, but Pro, Education, and Enterprise versions can use standard Docker which uses Hyper-V under the hood.
However you install it, make sure you get both the base Docker engine, and Docker Compose. It is included by default on Windows and MacOS, but must be installed separately on Linux host systems.
Please refer to the appropriate documentation for your system.
How do I use Docker?
While you can invoke Docker directly, it’s usually better to interact through
Docker Compose. Compose reads in a configuration file, docker-compose.yml, and
automatically executes all the required Docker commands to create the specified
environment.
The documentation for the latest Compose file format can be found at https://docs.docker.com/compose/compose-file/.
Step 1: Identify your softwares
The first step to creating your own Docker environment is to identify all the different software packages required to make your application work. For my project, I’ve identified these softwares:
- Apache web server
- PHP
- MySQL
- React
Step 2: Find your base images
Now that you know what softwares you need, go onto the Docker Hub and find images for each. You won’t always find a one to one match, but if you’re familiar with the software stack you want you can usually find a good image.
| Software | Docker Hub Image |
|---|---|
| Apache | httpd |
| PHP | php |
| MySQL | mysql |
| React | node* |
* React isn’t so much a software of its own as it is a a collection of Node.JS packages. Use the node image here instead.
Step 3: Read the documentation
Every premade image has its own set of quirks. Make sure you read at least the description page for each image you want to use in a project.
For example, the documentation for the Apache image says:
This image only contains Apache httpd with the defaults from upstream. There is no PHP installed, but it should not be hard to extend. On the other hand, if you just want PHP with Apache httpd see the PHP image and look at the -apache tags.
This means we can forego the httpd image and use just the php image. Looking
at the PHP image we can learn about the image variant php:<version>-apache
that combines PHP with the Apache httpd image. It suggests that when using this
image, you can make the Apache server host your PHP code by mapping it to
/var/www/html inside the container (the Linux default web root folder).
We also learn that:
This image ships with the default php.ini-development and php.ini-production configuration files.
It is strongly recommended to use the production config for images used in production environments!
The default config can be customized by copying configuration files into the $PHP_INI_DIR/conf.d/ directory.
Example
FROM php:7.4-fpm-alpine

# Use the default production configuration
RUN mv "$PHP_INI_DIR/php.ini-production" "$PHP_INI_DIR/php.ini"
That short code example is a Dockerfile that tells Docker to start with the PHP image, then activate the production settings by moving the production ini file into place. It’s usually best to have your development environment match production, so we should try to incorporate this tweak into our project.
Reading the MySQL image documentation we learn about the following environment
variables that can be set to influence how the container is set up:
MYSQL_ROOT_PASSWORD, MYSQL_DATABASE, MYSQL_USER, MYSQL_PASSWORD,
MYSQL_ALLOW_EMPTY_PASSWORD, MYSQL_RANDOM_ROOT_PASSWORD, and
MYSQL_ONETIME_PASSWORD. We’ll definitely want to use these to set up our
user accounts for the PHP.
We also learn that, for the MySQL image:
When a container is started for the first time, a new database with the specified name will be created and initialized with the provided configuration variables. Furthermore, it will execute files with extensions
.sh,.sqland.sql.gzthat are found in /docker-entrypoint-initdb.d. Files will be executed in alphabetical order. You can easily populate your mysql services by mounting a SQL dump into that directory and provide custom images with contributed data. SQL files will be imported by default to the database specified by the MYSQL_DATABASE variable.
It also talks about how to make your database data persistent, by mapping it to
a host folder. It suggests to use the volume /my/own/datadir:/var/lib/mysql as
it “mounts the /my/own/datadir directory from the underlying host system as
/var/lib/mysql inside the container, where MySQL by default will write its
data files.”
Perhaps the most important thing we learn, though it isn’t explicitly spelled
out, is that when running the image through Docker Compose, you need to have the
line command: --default-authentication-plugin=mysql_native_password. I can’t
explain why exactly this is needed, but without it PHP won’t be able to
authenticate with the MySQL server.
Looking at the node image documentation, we don’t learn much. It suggests using the default version of the image, which is “designed to be used both as a throw away container (mount your source code and start the container to start your app), as well as the base to build other images off of.” We’ll definitely need to use it as a base for our project.
Step 4: Create your Docker Compose file
Docker Compose creates and manages multiple containers that work together. It
reads the docker-compose.yml file from a local folder and decides what to do
to create a Docker environment that matches. To start, we’ll create a Compose
file that just runs the PHP image.
Create a new folder and place in it just a file called docker-compose.yml with
the following contents:
version: '3'

services:

  # Name the container `php`
  php:

    # Use the official PHP image, tag 7.2-apache
    image: php:7.2-apache

    # Map the web root into the container as read-only
    volumes:
      - ./html/:/var/www/html/:ro

    # Map host port 8080 to container port 80
    ports:
      - 8080:80
Also create a folder called html, with a file index.php containing the
following code:
<?php phpinfo();
From the command line, start the server using docker-compose up. It will spend
a few moments downloading the PHP image, then start it:
geek@geekpad:~/project$ docker-compose up
Creating network "docker_default" with the default driver
Pulling php (php:7.2-apache)...
7.2-apache: Pulling from library/php
54fec2fa59d0: Pull complete
cc4504446071: Pull complete
f8d55b89827d: Pull complete
6bf7f8bea876: Pull complete
81ecb6839daa: Pull complete
94884188472c: Pull complete
1d3e02b28167: Pull complete
33ff83407148: Pull complete
4617f4eca6aa: Pull complete
654275f8e310: Pull complete
0bba55070221: Pull complete
5c788088c872: Pull complete
5a642c29aee8: Pull complete
803b8635f17a: Pull complete
Digest: sha256:73bcb0798443c81d29aa0899ce5024321d4a432ff39bad9d82737ef8d8920f76
Status: Downloaded newer image for php:7.2-apache
Creating project_php_1 ... done
Attaching to project_php_1
php_1  | AH00558: apache2: Could not reliably determine the server's fully qualified domain name, using 172.21.0.2. Set the 'ServerName' directive globally to suppress this message
php_1  | AH00558: apache2: Could not reliably determine the server's fully qualified domain name, using 172.21.0.2. Set the 'ServerName' directive globally to suppress this message
php_1  | [Tue May 05 03:48:32.353670 2020] [mpm_prefork:notice] [pid 1] AH00163: Apache/2.4.38 (Debian) PHP/7.2.30 configured -- resuming normal operations
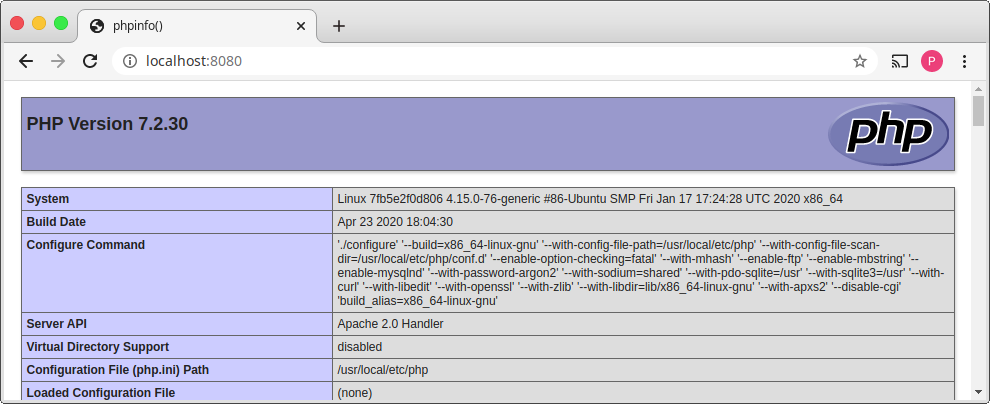
Once you get to this point, you should be able to access the PHP server by
browsing to http://localhost:8080/.